My Step-by-Step Furniture Flip Guide
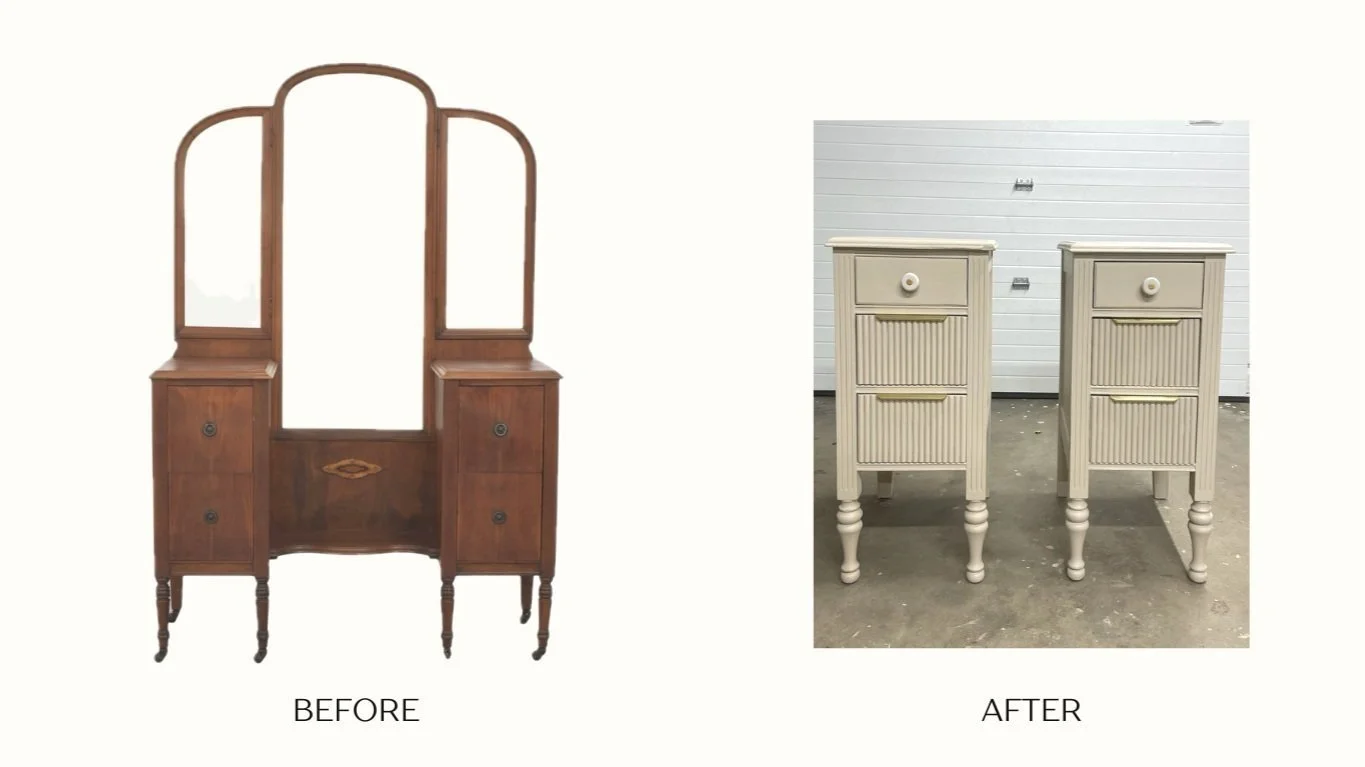
From vintage charm to modern Scandinavian design, discover how we transformed an old vanity into a pair of streamlined, sleek and contemporary night stands.
This charming vintage vanity has been with me since I was a teenager. It traveled with me to my first apartment and then moved in with my husband. When we first moved in together, I tried to transform the vanity into nightstands, but my initial attempt didn’t succeed. I began by separating the mirror from the side tables, which left me with two stand alone tables. I then applied chalk paint but didn’t address the damages that occurred when dismantling the vanity. The result was a dated style that with the poorly applied chalk paint, ended up looking even worse.
Inspiration:
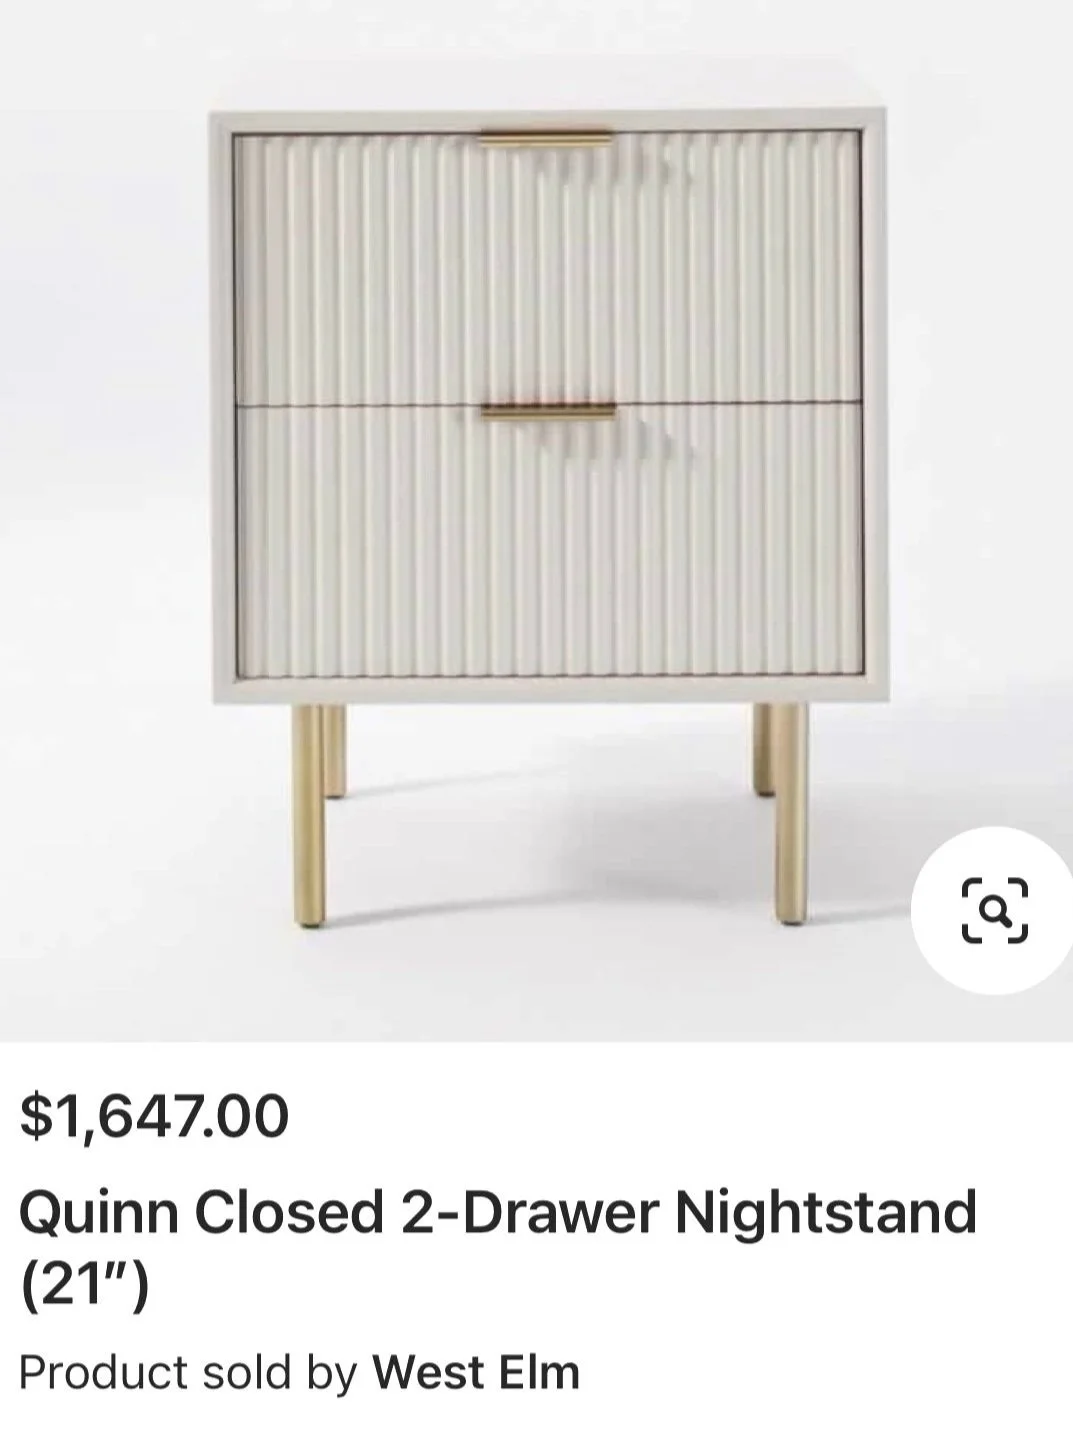
I decided I wanted to give these nightstands a second try and a true makeover. To infuse them with my personal touch, I decided to transform them into a modern Scandinavian design. My inspiration came from the West Elm Quinn 2 Drawer nightstands. I was drawn to their sleek, stream lined shape, texture finished, and neutral taupe color scheme.
Tools and Material Needed:
Orbital Sander
Paint Stripper
Plastic Wrap
Saw and/or Table Saw
Drill or Screwdriver
Wood Filler
Wood Glue
1/2 Wood Dowels ( Woodpeckers Craft Store)
Primer
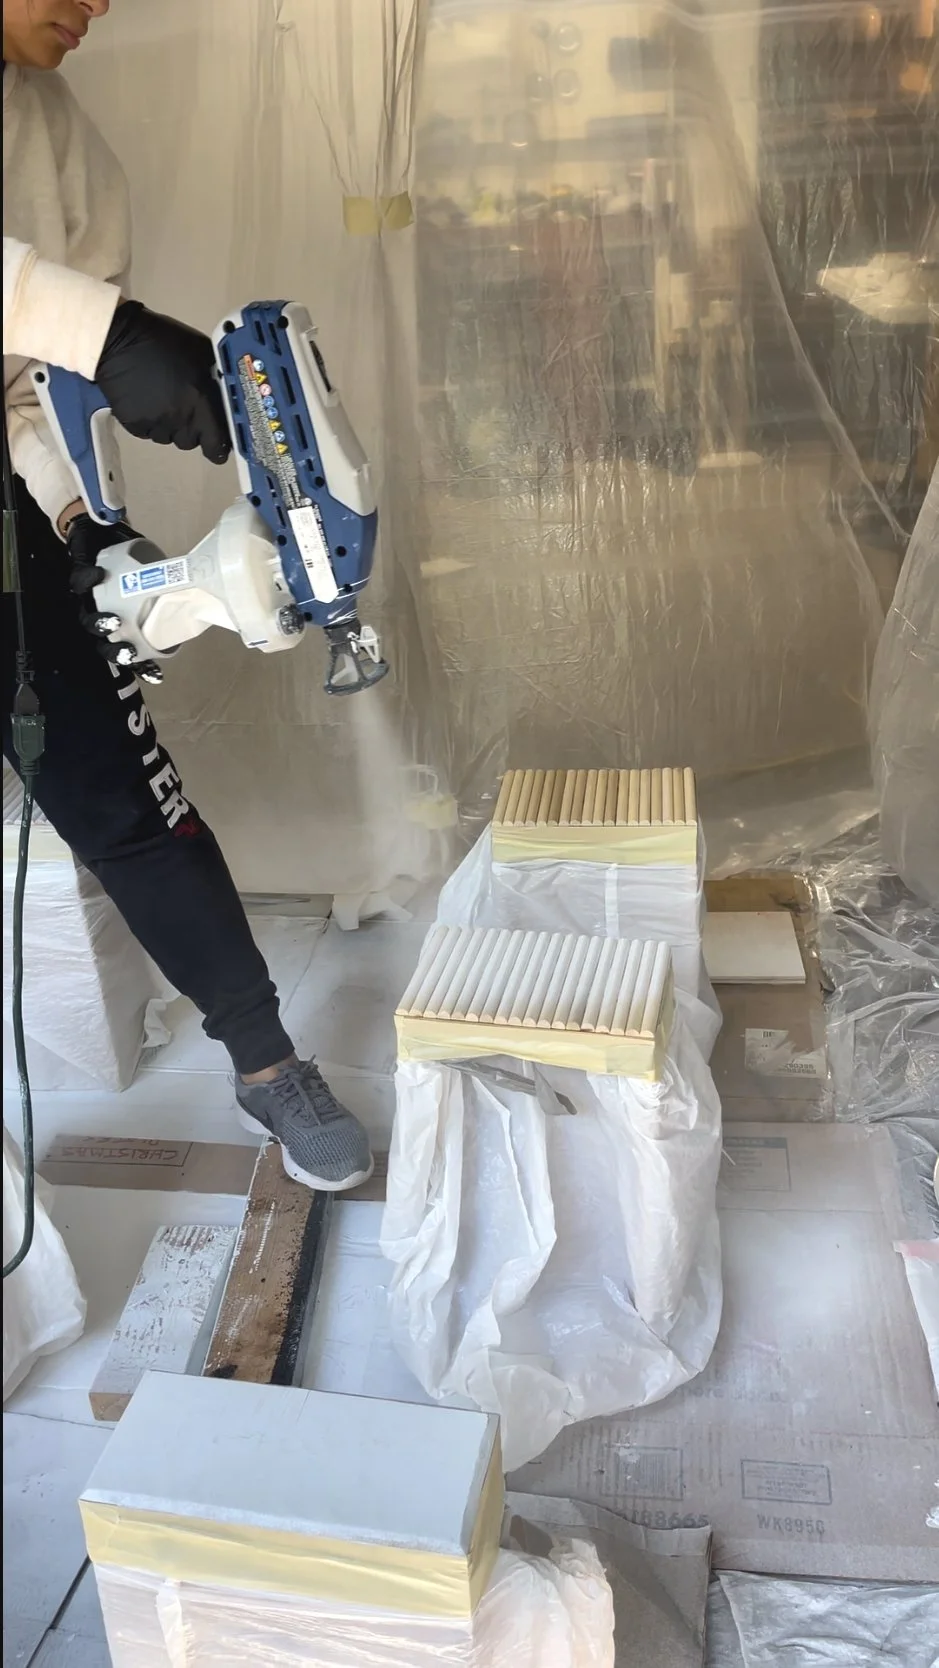
Paint Gun (Grace True Coat 360)
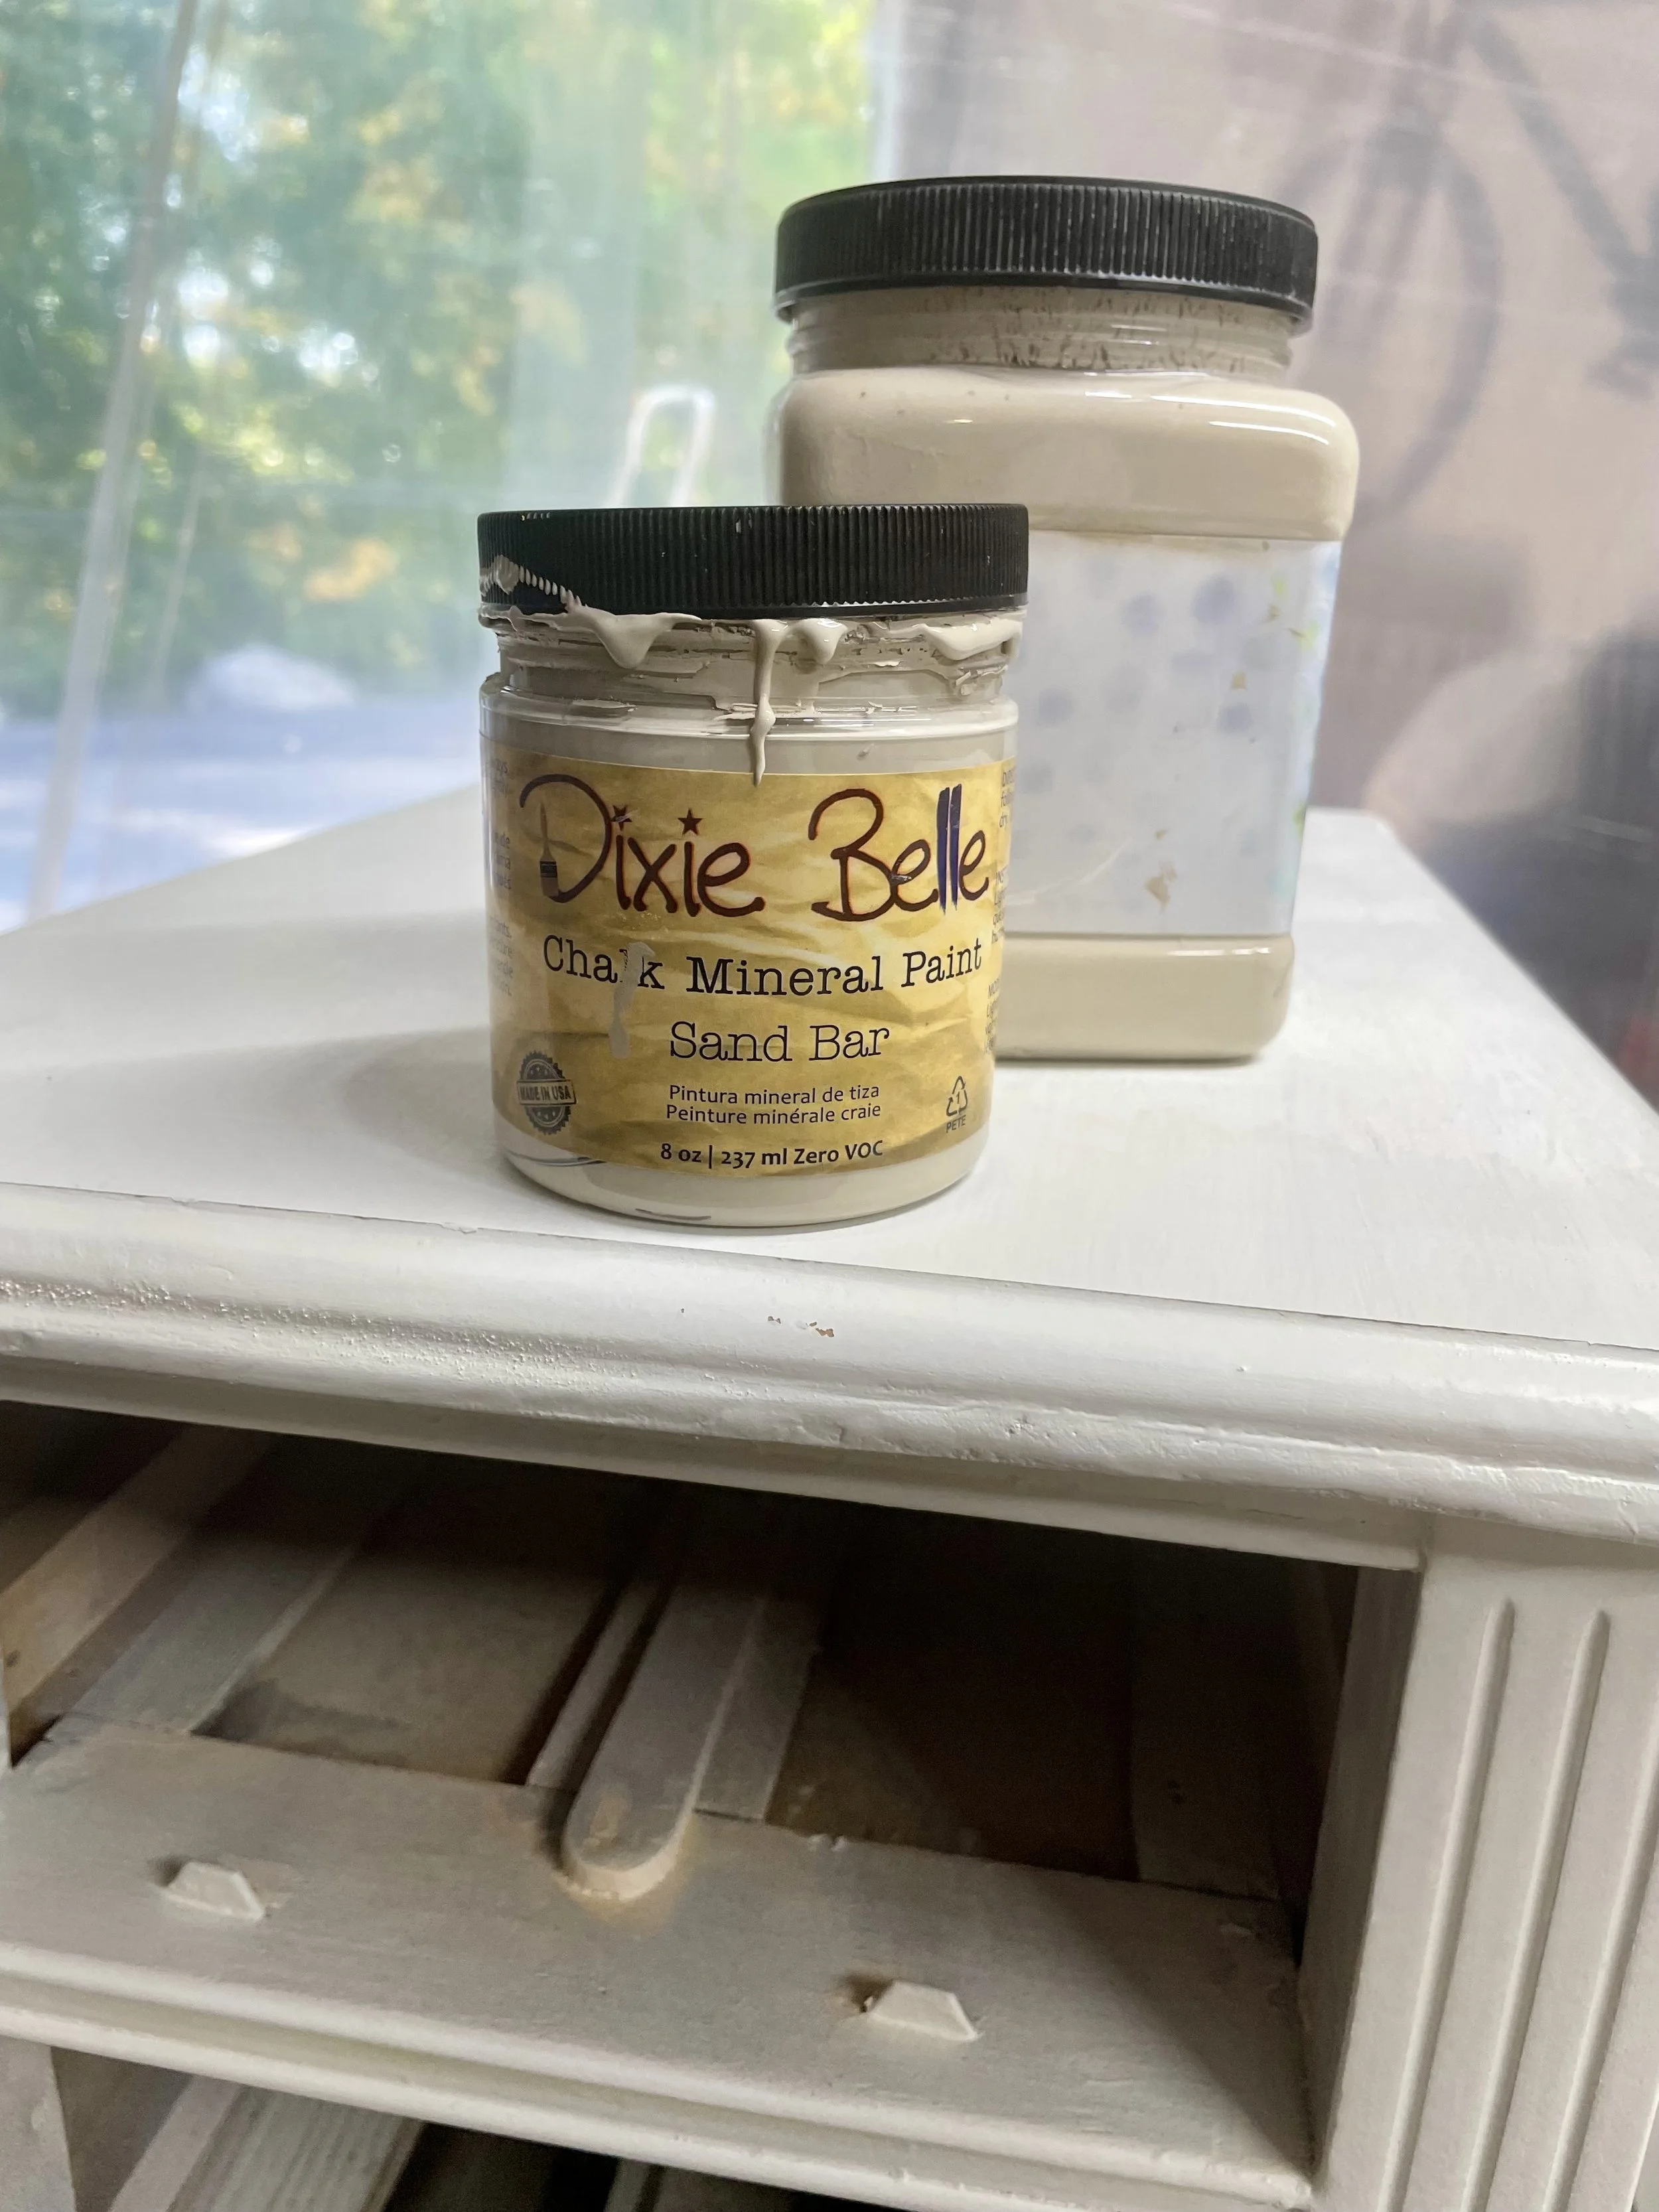
Paint (Dixie Bell - Sand Bar)
Clear Wax Seal (Dixie Bell)
Wax Brush
Plastic to Cover drawers and floor when painting.
Prep workspace: I moved the nightstands to my garage and cleared the area to be able to disassemble and get to work.
Disassemble: I removed all the hardware from the drawers. As well as removing some of the original features to achieve a sleek contemporary look. I started by taking off the appliqúes on the faces of the drawers and proceeded to remove the trims from the top and bottom of the nightstand. Removing these trims gave the night stands a clean straight outline.


3. Strip off Paint: Now learn from my mistake, if you have a piece of furniture which has been painted start with stripping the paint off rather than sanding. I used Citristrip Stripping Gel, wrapped the night stands and drawers in plastic wrap and after 24hrs I started scraping off the chalk paint.


4. Sanding and Touch Ups:
Using an orbital sander I started sanding with an 80-grit sandpaper to remove most of the dark stains, then switched to a 120-grit. I hand-sanded areas like the legs. At this time it’s important to use wood filler to cover gaps and imperfections. I added a wood strip to the sides of both nightstands for a flush surface.


5. Adding Texture: To add texture and a ribbed effect to the nightstands, I used half wooden dowels from Woodpeckers Craft Store. I measured the width and height of the faces of the two bottom drawer. Cut 18 dowels to 15.5 inches and used wood glue to attach them to the faces of the drawers. After letting the glue dry, I sanded the top and bottom of the dowels to match the frame of the drawers and to ensure everything was even.
6. Paint Prep: Before I start painting, I ensure I have enough space for spray painting to contain any splashes. I cover the floor with a drop cloth and old cardboard boxes, and use plastic sheeting to protect nearby items from paint splatters.
I also wipe down the nightstand to remove sanding dust and cover the drawers with plastic bags, leaving only the faces exposed for painting..
7. Prime: I primed the entire nightstand and faces of the drawers with Primer ….. I gave everything two coats of primer using the Grace True Coat 360 paint gun.
8. Paint & Seal: Once the second coat of primer had dried (after 24 hours), I prepped to paint the nightstands. I used Dixie Belle's Chalk Mineral Paint in the color Sand Bar, applied two coats, and let it dry completely. Sealed the surface with a Dixie Belle best dang clear wax.

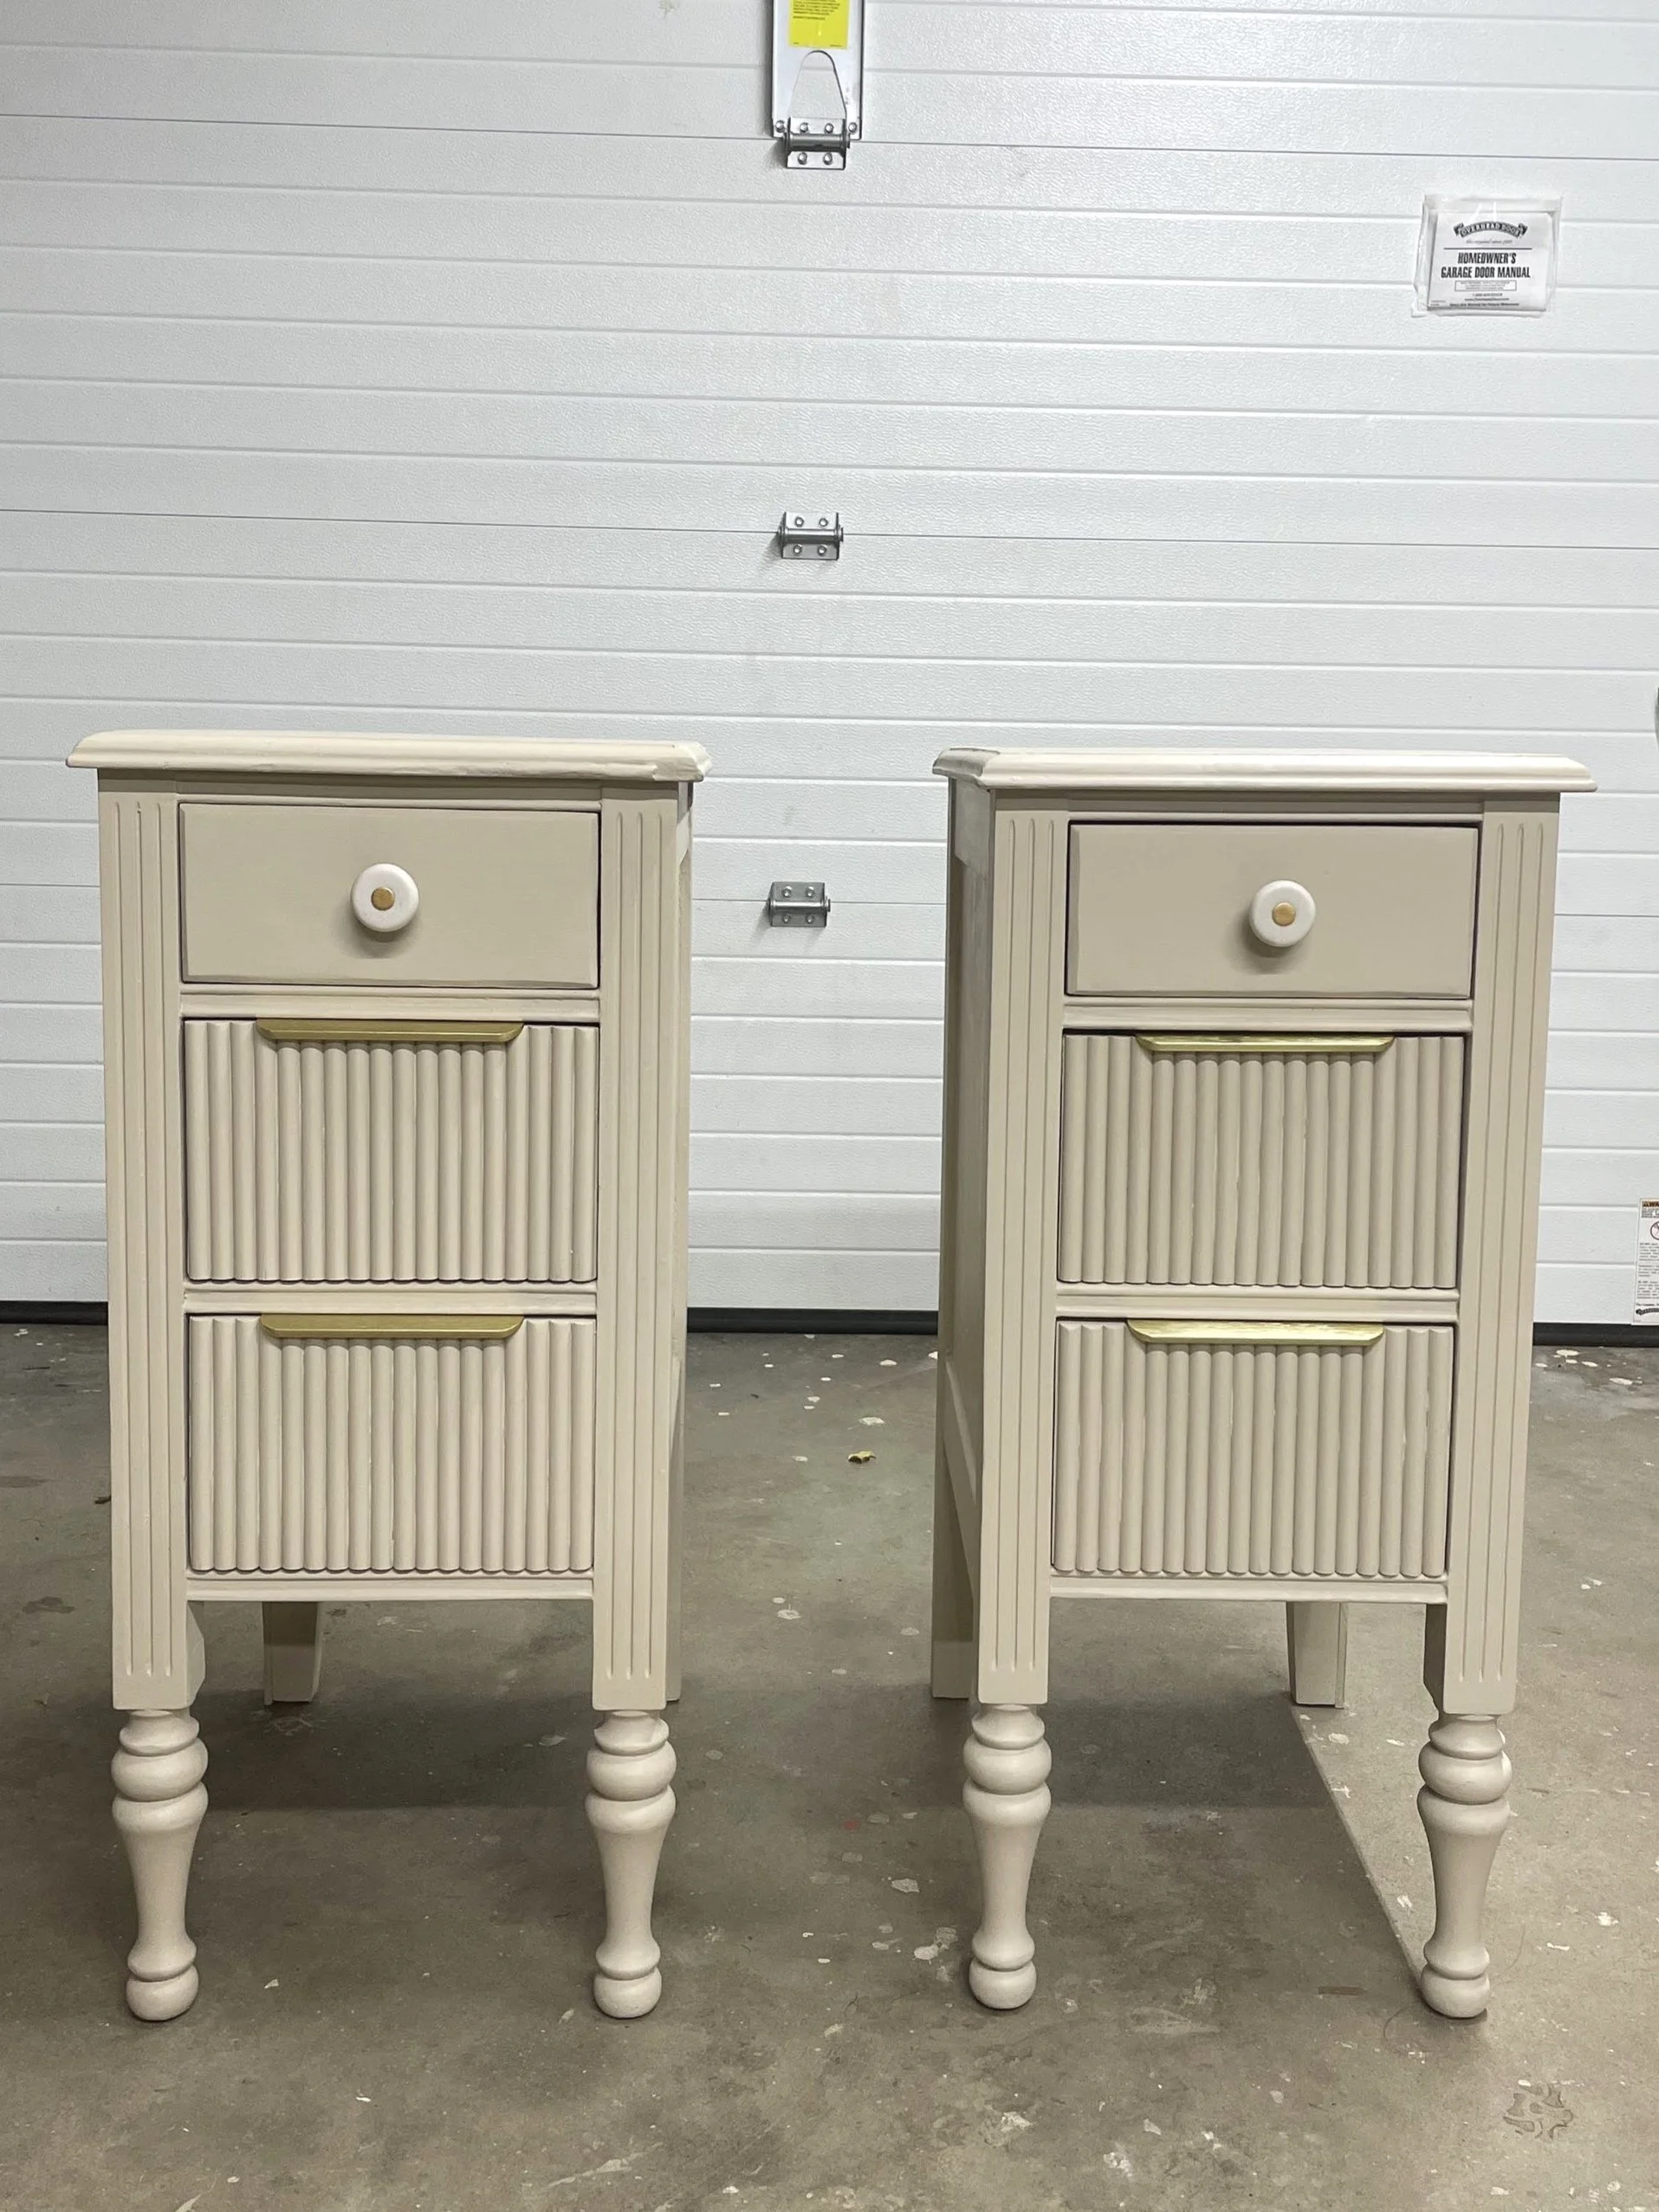
9. Hardware: For the final touch I added gold hardware which I purchased from amazon and Etsy.
This is the final look! Hope this project inspired you or taught you a little something on how to flip furniture.